
 Search Here
MISC
Parts List
Robot Forum
Chat
Member Pages
Axon MCU
Robot Books
Shop
Contact
SKILLS
How To Build
A Robot
Tutorial
Calculators
Mechanics
Programming
Miscellaneous
Robots
Space
HARDWARE
Actuators
Batteries
Electronics
Materials
Microcontrollers
Sensors
SCIENCE
Robot Journals
Robot Theory
Conferences

|
Remote Control Robotics
Some may argue that a robot is not really a robot if it isnt autonomous. Maybe it is or maybe it isn't. Point being, those some are morons. Learning how to implement remote control features into a robot is a very important skill in robot making. To justify it, I will quickly go over robot intelligent control methods . . .
Introductory to Robot Intelligence
There is actually a spectrum for robot intelligence. Fully remote control
and fully autonomous are not your only options.
Instead you should decide what level of intelligence
you wish your robot to have. Generally assume the more intelligent, the
more difficult to build.
Here are the main categories:

Automaton 'Intelligence'
The lowest level of robot 'intelligence' is a simple automaton device.
My definition of an automaton is a device where there is absolutely zero decisions
made no matter the given environment.
They are simple devices where the action it does is repetitive and automatic.
A simple circuit with a motor or a combination of gears and a spring could easily
be an automaton. Ever hear of those 'robots' from the 1800's that apparently
can write names and poems and other useless stuff? They were very well
designed gear integrations. However these 'robots' would keep writing even if the ink well ran
out of ink . . . The device simply has no fault tolerance, and will continue attempting the action.
They did not even have a method to sense the environment - a requirement of decision making.
BEAM 'robots' basically fall into the same category,
except they are made from very well designed electronics instead of gears.
Remote Control 'Intelligence'
Remote control is the next level of robot 'intelligence.' Our current technology is
capable of building so many machines physically capable of so much more than
any lifeform on our planet. Our planes fly many times the speed of sound,
our everyday cars can cross the Sahara Desert in days, but our
best computers cannot even match a roach brain in terms of autonomy. Solution?
Put the human brain in the driving seat of our machines. This allows for the
best of both worlds. Strength and expendability of a machine, brain of a human.
Battlebots is a perfect example.

Teleoperation
Teleoperation is one step above remote control. The advantage a computer has
over the human brain is speed. A typical home computer today can crunch more numbers in
a few seconds than a human can in an entire lifetime. But despite that speed,
the computer does not have a good understanding of the situation. Added to that, our most advanced
electronic sensors cannot match our human eyes and ears for observing the situation.
Solution? Let the human make the decisions, but have the computer carry them out.
A perfect use for this would be a robot spider. A human operator in no way can control
8 legs with 3 joints each. Instead, the human would give commands like 'go forward'
or 'rotate' and the computer will handle the rest. This method is also very common
with space robots because of the long transmission delay.
Full Autonomy
Fully autonomous robots are still a dream. It is a huge area in current state-of-the-art
robotics research. It concerns artificial intelligence, consciousness, advanced
sensory percerption . . . the list goes on. Huge philosphical implications as well.
But all this is out of the scope of this tutorial. If you make a robot
that can intentionally navigate from your couch to your kitchen and back without any collisions
all by itself, you have built an autonomous robot.
But if it fails to bring a beer back you are still a beginner in my eyes . . .
How to Build a Remote Control Robot
The remote control robot is probably the easiest of all robots you can make.
A complete beginner can probably make a basic remote control robot in under an hour. The electronics part
is plug-n-play, the robot chassis
being what will take a little time. Remote control robotics is great for those who want
to build a robot - yet does not have
enough time, skill, and/or patience to so see a large project through to completion.
Have a look at an example of a wall climbing robot with an arm.
First, a video to help you get started:
All you need is a few cheap commercially available items:
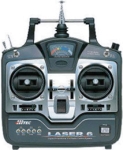
Remote Control Transmitter
The remote control transmitter is the handheld thingy with knobs and buttons and a long intenna
sticking out of it. This will be the most expensive part you need to buy, around $40-$200.
It will require it's own battery and battery charger. The remote control transmitter usually has
very good range. Once as a test, I put my robot
in the basement of a building, climbed to floor 10, then operated it without any issues.
If you plan to ever do USAR (Urban Search and Rescue), this is a useful feature.
The most important feature you need to be concerned with is number of channels it can operate on.
Each channel allows you to control one more item on your robot. I recommend at least three,
but I have often used up to six on a single robot in the past.
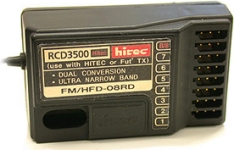
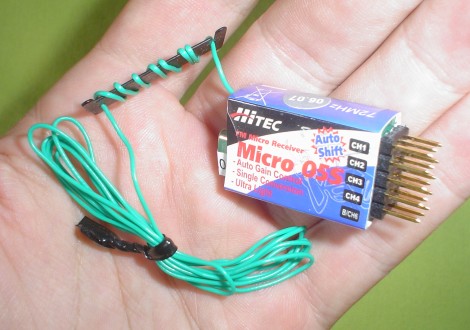
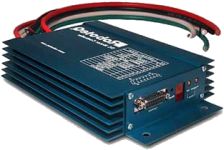
Receiver
The receiver is a small little box thingy that you put on your robot. It accepts the signal
from your transmitter, processes it, then outputs a servo ready signal. This will be
the second most expensive part, usually around $30-$60. It will require
around ~5V to power it.
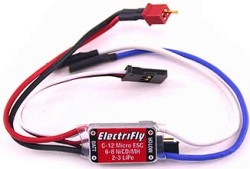
Receivers can get really small:
If you want to use a higher voltage for the servos, get something called a Y-harness (see below image).
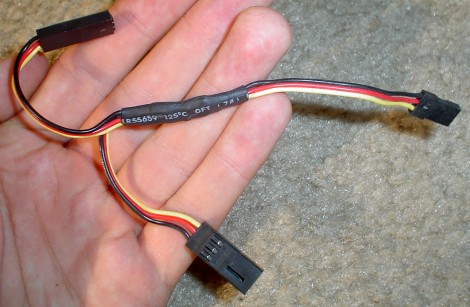
You simply attach it to a servo port, and then attach your higher voltage batteries and your servo to the other end. Read the instructions for power! Like with the transmitter, you must be concerned with how many channels you would like to have.
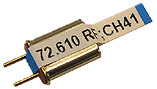
Operating Frequency Crystal
Both your transmitter and your receiver will each require a crystal. These are necessary
to ensure both of your devices are operating under the same frequency (so purchase
both crystals with the same channel!!!). For RC, there are
two frequencies you need to be aware of. One is for air and one is for surface.
Remember, its illegal and bad practice to control a remote control car with an air frequency.
You could accidently cause someone's remote control aircraft to crash and kill some poor cute innocent squirrel!
But you already knew that . . . When you purchase your receiver/transmitter, they will specify whether it
should be used for air or surface RC. Another note, the crystal is fragile. If your remote control vehicle
crashes a lot, the crystal could get damaged. I once made a robot for a USAR competition
that was designed to handle 7 foot drops. But apparently the crystal was not.
It broke. Sadness. The solution?
Receivers often come with a foam pad thingy to wrap it in for shock absorption. If not, find
some foam padding and use it. The crystals usually come as part of your transmitter and
receiver, but if not, or if you break one, they cost like $8 plus shipping to replace.
The materials above are the basics required for remote control, but you are not yet done. You now need a few more things to build the robot chassis:
-
Optional: Robot Frame Material
HDPE and/or aluminum should be used for the frame. Want to build it in 5 minutes? A simple square sheet of HDPE with all parts velcroed on will actually work! But you should attach everything more permanantly for a well designed robot.
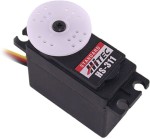
Optional: Servos
Servos, although not required, are designed to
be used with remote control vehicles. All you do is literally plug it straight into
your receiver and it instantly works. Get two servos - one for each side of your robot -
so that you have differential
drive. Put a castor in back for balance. You can also use additional
servos for other things such rotating a camera, lifting a shovel, or operating a robot arm.
If you are on a strict budget, I highly recommend the Hitec HS-311 servos. They only cost
about $8 and work really well for what you need. But of course, the $30 servos work even better . . .
And here is how to mount servos onto a robot chassis.
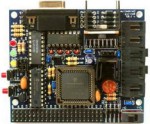
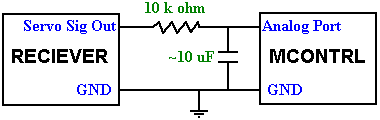
Optional: Teleoperation
Now you do not need a microcontroller for any
basic remote controlled robot. But if you want it teleoperational, you must have something
to process your commands. So how does this work? The basic concept is
- send a command with the transmitter to the receiver
- the receiver then outputs a servo square wave
- a simple resistor capacitor circuit changes this square wave to an analog value
- and then an analog port on your microcontroller interprets
this analog value into a particular command, based upon your written program.
The servo signal to analog signal converter circuit:
Optional: High Power Motor Driver / Speed Controller
If you want a high powered robot that uses something much more powerful than hobby
servos, you would instead want a motor driver. Most on the market should directly
accept a signal made for a servo, and convert that to what you would need for
DC motors. Just hook this device up
to your receiver, and attach your motors and battery to it, and by happy squirrels you
have an instant Battlebot. Be aware that these can get a little expensive, and many
are only capable of handling a single motor - meaning you would need to buy two.
Optional: Speed Controller
The speed controller is basically an H-bridge
that operates by a remote control signal. Plug one wire into the receiver, two onto the battery leads,
and two on the motor leads - and wallah its controllable by your transmitter. If you wanted to build a fast
dc motor driven remote control vehicle, or perhaps need a motor to drive the weapon of your
battle bot, this is the way to go.
Last Step: Assembly of your Remote Control Robot
I figure the best way to explain this is to show an example. This particular robot was made
by me and a friend in less than 5 hours back in early 2003. It uses somewhat expensive lexan plates,
a lego castor, and
super glue, double sided sticky tape, and velcro
to connect everything together. Ghetto, yes. But it held together really well and was easy/quick to make.
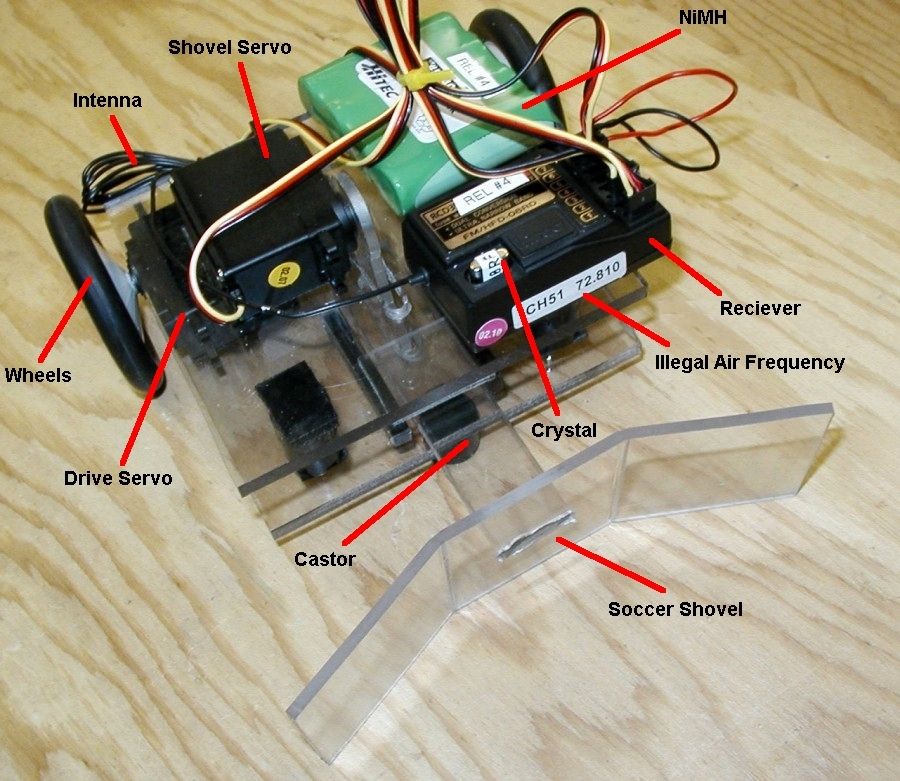
It was designed to play soccer, but since I lived in Pittsburgh at the time there was also plenty of snow to shovel . . . Here is a video of it in action:
The remote control that I used was the
Laser 6.
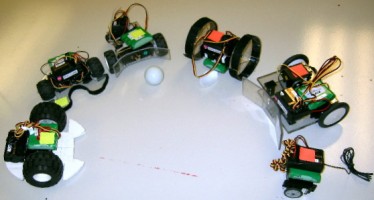
And here are two teams of remote controlled
soccer robots all made in the same fasion:
72 megahertz, Channels 11 - 60: This is the most popular choice for flying models.
Most radios designed for model aircraft and helicopters will be available on these channels.
DO NOT use this frequency for anything other than aircraft, as you could unintentionally cause
a crash of someone else's remote control aircraft nearby. Big deal? Not so big when they lose hundreds in $$
from damage, or even worse, a death or injury results from the crash . . .
75 megahertz, Channels 61-90: Cars, boats, and other non-flying models must use one of these channels.
Pistol grip radios are available on 27 MHz as well as 75.
27 megahertz, Channels A1-A6 and 50 megahertz, Channels 00-09: While legal for air or surface use,
we recommend that 27MHz be used only for surface models. A pilot and driver broadcasting on the same 27MHz
frequency would cause interference and could cause a crash. 50MHz channels can be used for R/C, but
require the user to attain a
Technician-class Amateur Radio License
from the FCC.
Radio Frequency Reference Chart
On rare occasions you may want to know what frequency you are broadcasting on,
and not just which channel it is. For example, if your remote control robot
is for an underwater environment, you would want the lowest frequency possible
to minimize attenuation (interference).
|
Aircraft Use Only (72 MHz)
Channel Frequency 11 72.010 12 72.030 13 72.050 14 72.070 15 72.090 16 72.110 17 72.130 18 72.150 19 72.170 20 72.190 21 72.210 22 72.230 23 72.250 24 72.270 25 72.290 26 72.310 27 72.330 28 72.350 29 72.370 30 72.390 31 72.410 32 72.430 33 72.450 34 72.470 35 72.490 36 72.510 37 72.530 38 72.550 39 72.570 40 72.590 41 72.610 42 72.630 43 72.650 44 72.670 45 72.690 46 72.710 47 72.730 48 72.750 49 72.770 50 72.790 51 72.810 52 72.830 53 72.850 54 72.870 55 72.890 56 72.910 57 72.930 58 72.950 59 72.970 60 72.990 |
Surface Use Only (75 MHz)
Channel Frequency 61 75.410 62 75.430 63 75.450 64 75.470 65 75.490 66 75.510 67 75.530 68 75.450 69 75.570 70 75.590 71 75.610 72 75.630 73 75.650 74 75.670 75 75.690 76 75.710 77 75.730 78 75.750 79 75.770 80 75.790 81 75.810 82 75.830 83 75.850 84 75.870 85 75.890 86 75.910 87 75.930 88 75.950 89 75.970 90 75.990 |
All Uses (27 & 50 MHz)
Channel Frequency A1 26.995 A2 27.045 A3 27.095 A4 27.145 A5 27.195 A6 27.255 00 50.800 01 50.820 02 50.840 03 50.860 04 50.880 05 50.900 06 50.920 07 50.940 08 50.960 09 50.980 |
Society of Robots copyright 2005-2014