
 Search Here
MISC
Parts List
Robot Forum
Chat
Member Pages
Axon MCU
Robot Books
Shop
Contact
SKILLS
How To Build
A Robot
Tutorial
Calculators
Mechanics
Programming
Miscellaneous
Robots
Space
HARDWARE
Actuators
Batteries
Electronics
Materials
Microcontrollers
Sensors
SCIENCE
Robot Journals
Robot Theory
Conferences
=== Package Assembly ===
The Package
The package (or space capsule) is the small container that all your goodies go in to. It'll have holes for the camera
to look through and the antenna to stick out, and have environment monitoring sensors attached to it. It'll have string/rope
attached that goes up to the parachute midway and then to the balloon up at top. And the entire thing will be
strong enough to take a good thrashing - not to mention a 100,000 feet fall. To design your package, every phase of the flight
must be accounted for.
Lift Off
This is the ascent phase of the balloon.
As the package goes up, the balloon will start to spin with the wind. Unless you want camera video that makes
you nauseous, along with blurry stills, you'll want to add a swivel system. While the balloon
may spin with the wind, the swivel system does its best to keep the package from spinning with it.
You can buy cable swivels at mcmaster.com. Get one rated for at least 10x the weight of your actual package to handle the dynamic loads. We once used a swivel that was supposedly able to handle 25 pounds for our 4 pound package, but it broke anyway at some point during re-entry.
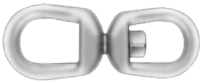
image: cable swivel
You also want a very strong string designed for loads. A spool of 100 pound test Spectra kite line will do. More design info for the string and swivel can be found on the space photography tutorial.
Jet Stream
In about ~20 minutes after lift-off the balloon will enter the jet stream.
The jet stream will thrash the hell out of your package, so it needs to be very robust.
In the jet stream the temperature will go as low as -70C. Most batteries will fail at around -20C, and most have reduced current output under 0C. This can cause failures for high current applications, so you need to insulate your batteries very well. The below image is the proper way to insulate a battery, wrapping it first in foam and then lightly packing it with duct tape.
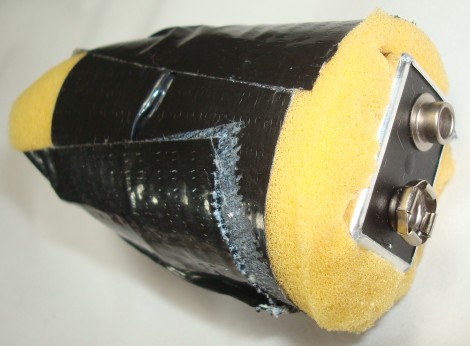
image: 9V battery wrapped in foam insulation
Space
After the jet stream, about ~40 minutes into the flight, the balloon will reach a region of very low atmosphere:
no wind, and no atmospheric protection from the sun.
As there is no air to cool your package, and the sun is microwaving your package, your system can start to overheat.
Space is *NOT* cold!!!
We once had a camera experience thermal shutdown due to this heat. Voltage regulators also have thermal shutdown, risking electronics
failures. So you'll need thermal management (or just pray really hard).
warning: Insulation meant to protect from the cold can cause overheating.
To help you prepare, I've uploaded our temperature data for several flights in my space balloon temperatures tutorial.
At some point floating up at less than 3% atmosphere, about ~80 minutes into the flight, the balloon will pop. As there is no air to resist the fall in the upper atmosphere, the parachute will be useless and the package will drop like a rock.
Re-entry and Descent
And then the balloon re-enters the jet stream, getting thrashed about, and risking freezing at -70C yet again.
The parachute will gradually slow the package down as air pressure increases. Depending on the winds, the package can blow for dozens of miles. If your parachute is too big it will have a slow descent rate - expect to drive for a long time chasing it. If the parachute is too small, your package risks damage during 'landing'. You did simulate the balloon, right?
disclaimer: I did not make the parachute, but this is what I learned from others. Refer to the parachute tutorial by Parallax for more help.
Typically you'd need to custom make your own parachute, with sewing thread and needles and all. I don't mean sew by hand - buy a cheap portable hand powered sewing machine. Or hire your mom.
Make the chute out of ripstop nylon, which can be found in typical fabric stores. This fabric has a special weave that prevents tears and rips from spreading. Use a cutting tip for a soldering iron to cut the fabric. The hot tip melts the nylon threads of the fabric together, keeping the fabric from unraveling.
The chute also needs a 'spill hole'. Ever wonder why there is always a hole in the center of a parachute? Without it the chute will rock back and forth to relieve built up air pressure. The hole acts as a pressure relief valve.
Go run with your parachute to make sure it's inflating symmetrically, and make adjustments to the string lengths if otherwise.
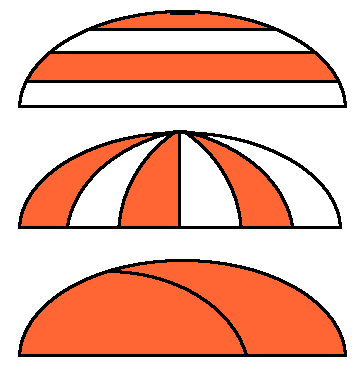
Below are various parachute designs, showing how different color cloth can be cut and assembled. The last design uses one single sheet and hence is easier, but it's not patterned. Don't use green colors as it matches with trees, nor blue as it matches water and the sky. Red stands out really well against the green of trees, but will appear black during night recoveries.
We've considered not using a parachute at all and just letting the package drop. The package would then be covered in soft padding. Without a parachute, or at least a very small one, the required recovery time and driving distance would be much shorter. But, you also would get less data and pictures from the package during the return trip. The parachute also makes it much easier to recover it, visibility-wise. A trade-off.
The string should be attached in this order:
balloon => parachute => swivel => package
Use the bowline knot to tie it up - it's never going to come loose. After testing, use heat shrink over any bowline knots to be double sure they don't come loose.
Safe Landing
After another ~40 minutes of descent it'll finally land, and hopefully not in
the middle of a deep forest, river, or someone's backyard swimming pool (all mostly avoidable with really good pre-flight planning).
Your package should consider the landing. Use a really long rope between the package and the balloon, so that if the parachute gets stuck in a tall tree, you can
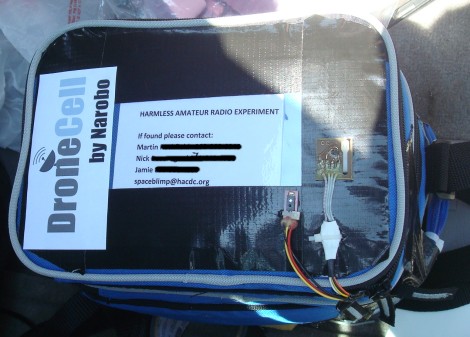
just cut the rope. Add flotation foam to it. And put a big waterproof label on it that says "HARMLESS BALLOON EXPERIMENT: CALL XXX-XXXX IF FOUND; EMAIL: [email protected]".
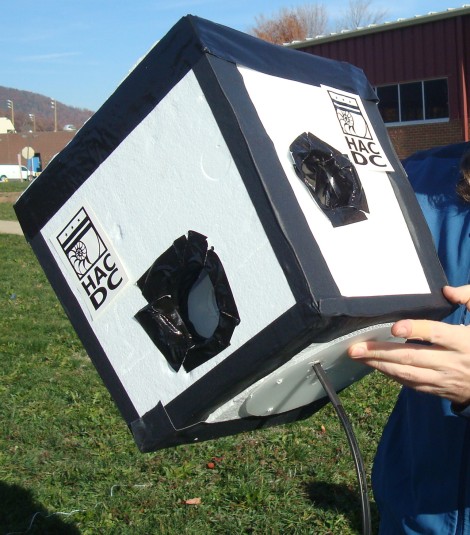
How NOT to Make a Package
You are probably by now thinking of some crazy design made of styrofoam. But you know what, HacDC (our group)
tried it many times. Although they worked, don't bother - it's not the way to go. The following pictures are of the best attempt
at a foam design we had. I'm showing you mostly so you can see what we've tried.
This is what it looked like from the outside. It had a hole on each side for a camera, and the antenna came out the bottom.
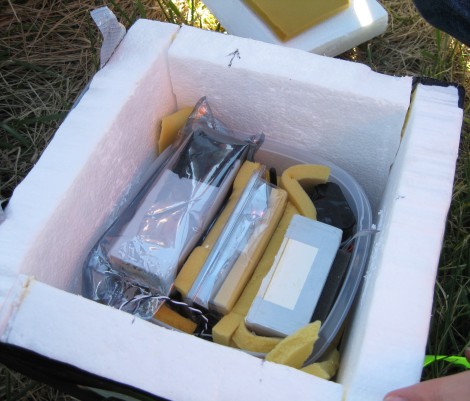
Removing the square foam top, this is what it looked like inside. Everything was securely mounted and/or fitted to the plastic container on the inside. Additional air space was crammed with styrofoam peanuts. If you do not fill in that air space, freezing cold air will rush in as the package returns through the jet stream. The peanuts also help prevent stuff from shifting around during flight, and act as shock absorbers during landing.
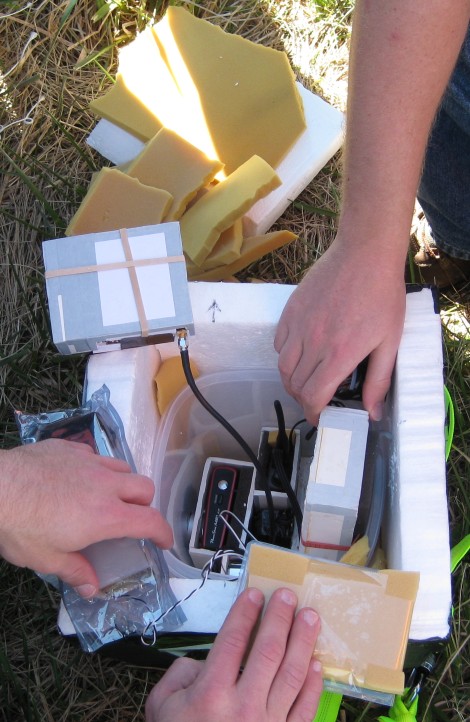
After removing the loose components, you'll see the mounted camera and transmitter inside.
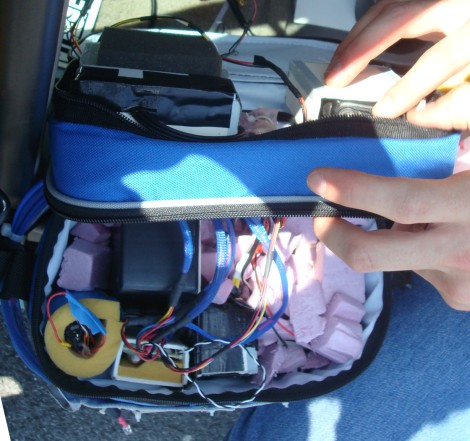
The Best Way to Package Everything
We've completed two flights using a 6-pack beer cooler container (reusable lunch bag?) and have determined this is the best
way to pack your snack. They come in many shapes and sizes, cost like $20, and are specifically
designed to be insulative. The carry strap is perfect to attach to the balloon cable, and
you can place a hard sheet of plastic (or whatever) inside to mount everything firmly. Click this below
image to see a fully packed package.
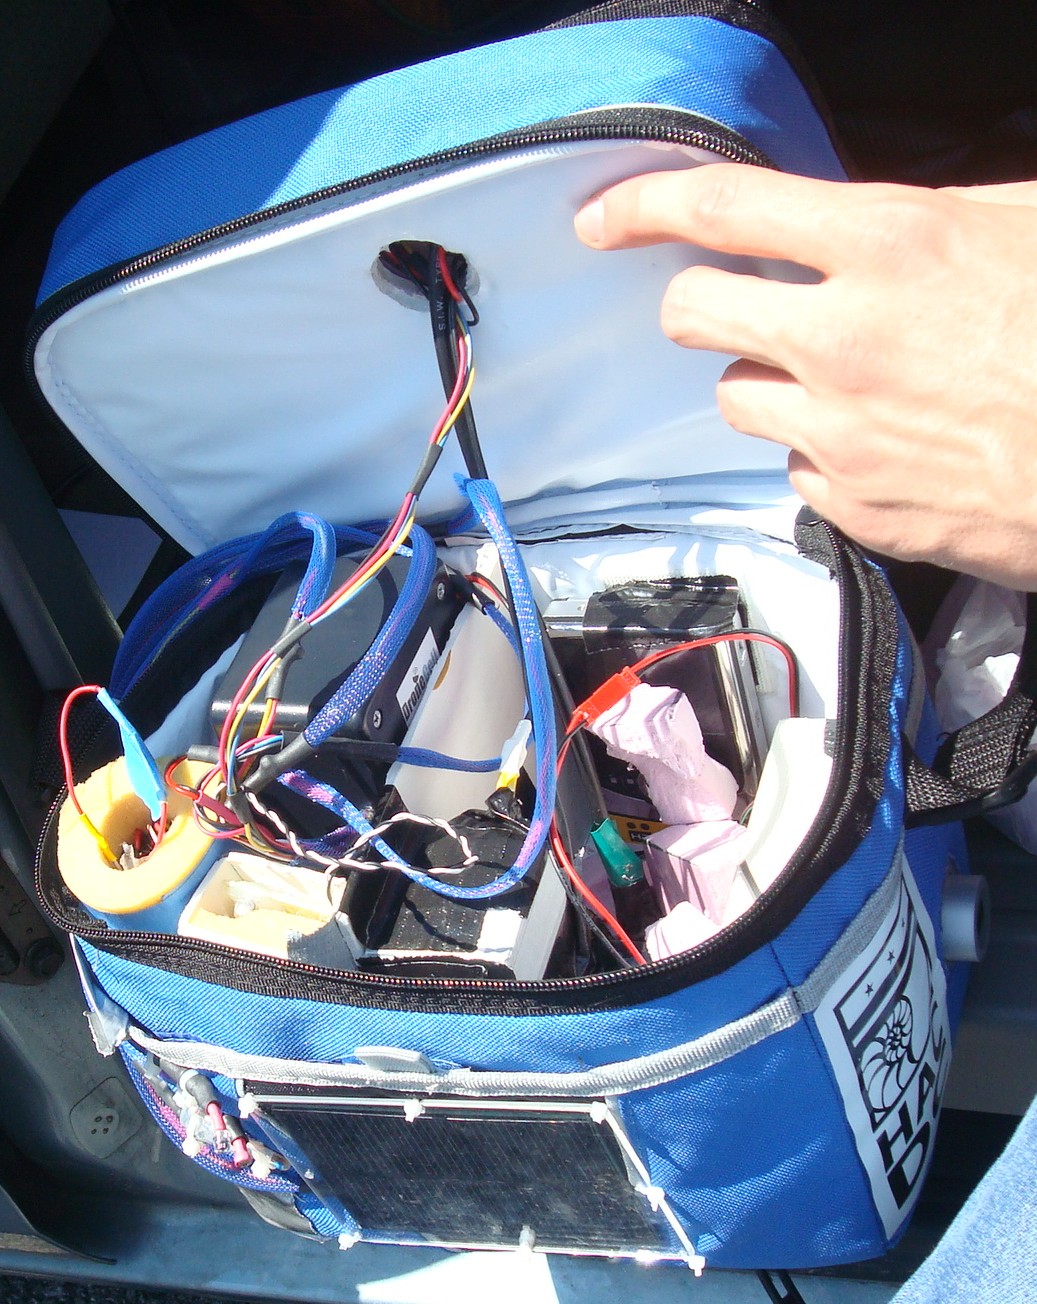
The cooler we got had two levels: the large main compartment, and a lid to fit additional components. We placed the sensitive equipment that required a good clear signal at the top (such as GPS, etc), while the heavy stuff like batteries went at the bottom of the lower layer. Batteries block GPS signals so keep them away from antennas.
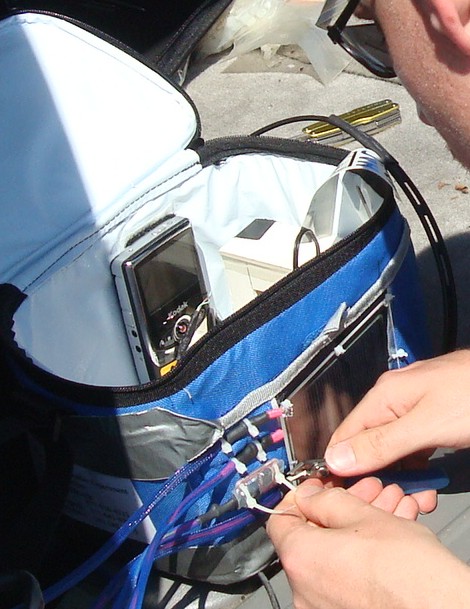
Zip-ties were used to attach various sensors and the solar panel to the outside of the cooler. On the inside you can see a camera firmly mounted, and then velcro was used to keep it flush with the cooler. This camera was known for overheating so it had no special insulation. Avoid using chemical adhesives as freezing temperatures could cause hardening and cracking.
A few more items were packed in, and a divider was added to prevent stuff from shifting around.
![]()
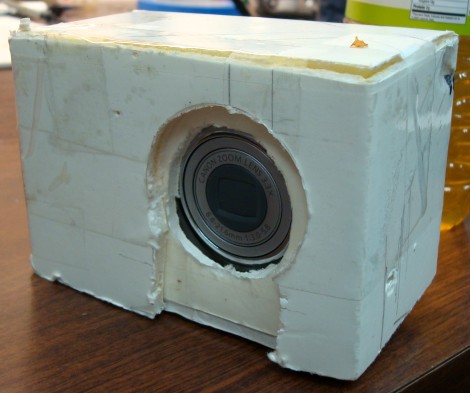
This is how to properly insulate a camera and to keep stuff from accidentally pressing against it's buttons.
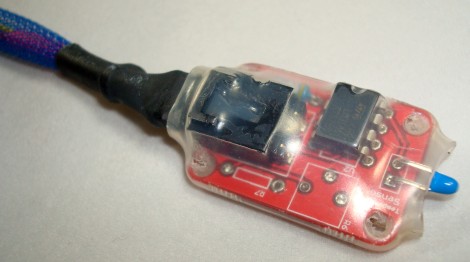
This is how to properly insulate and protect an external sensor. Wiring was attached using male-female headers, it was then hot-glued to prevent wiggling, and finally the entire device was shrink-wrapped. The wire itself was wrapped in a protective plastic (which was zip-tied and shrink wrapped on) so that the wire wouldn't fray if anything rubbed against it.
How to Pack Electronics
When I first started packing my electronics I had a good idea of everything that needed to go inside.
The problem however is that wiring takes up quite a lot of space - especially in the prototyping phase.
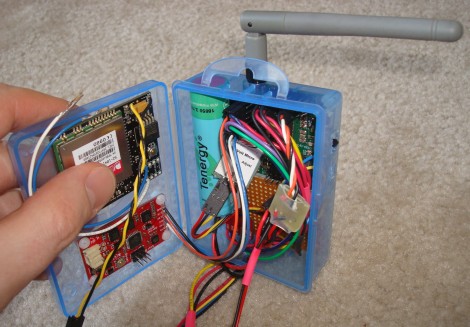
My first attempt was using a plastic Hitec servo box as shown below. I drilled various holes in it for screws and the antenna to poke out. It seemed to work fine, but it was too crammed so had to ditch the idea. It's always a good idea to have more space than is needed for future upgrades, anyway.
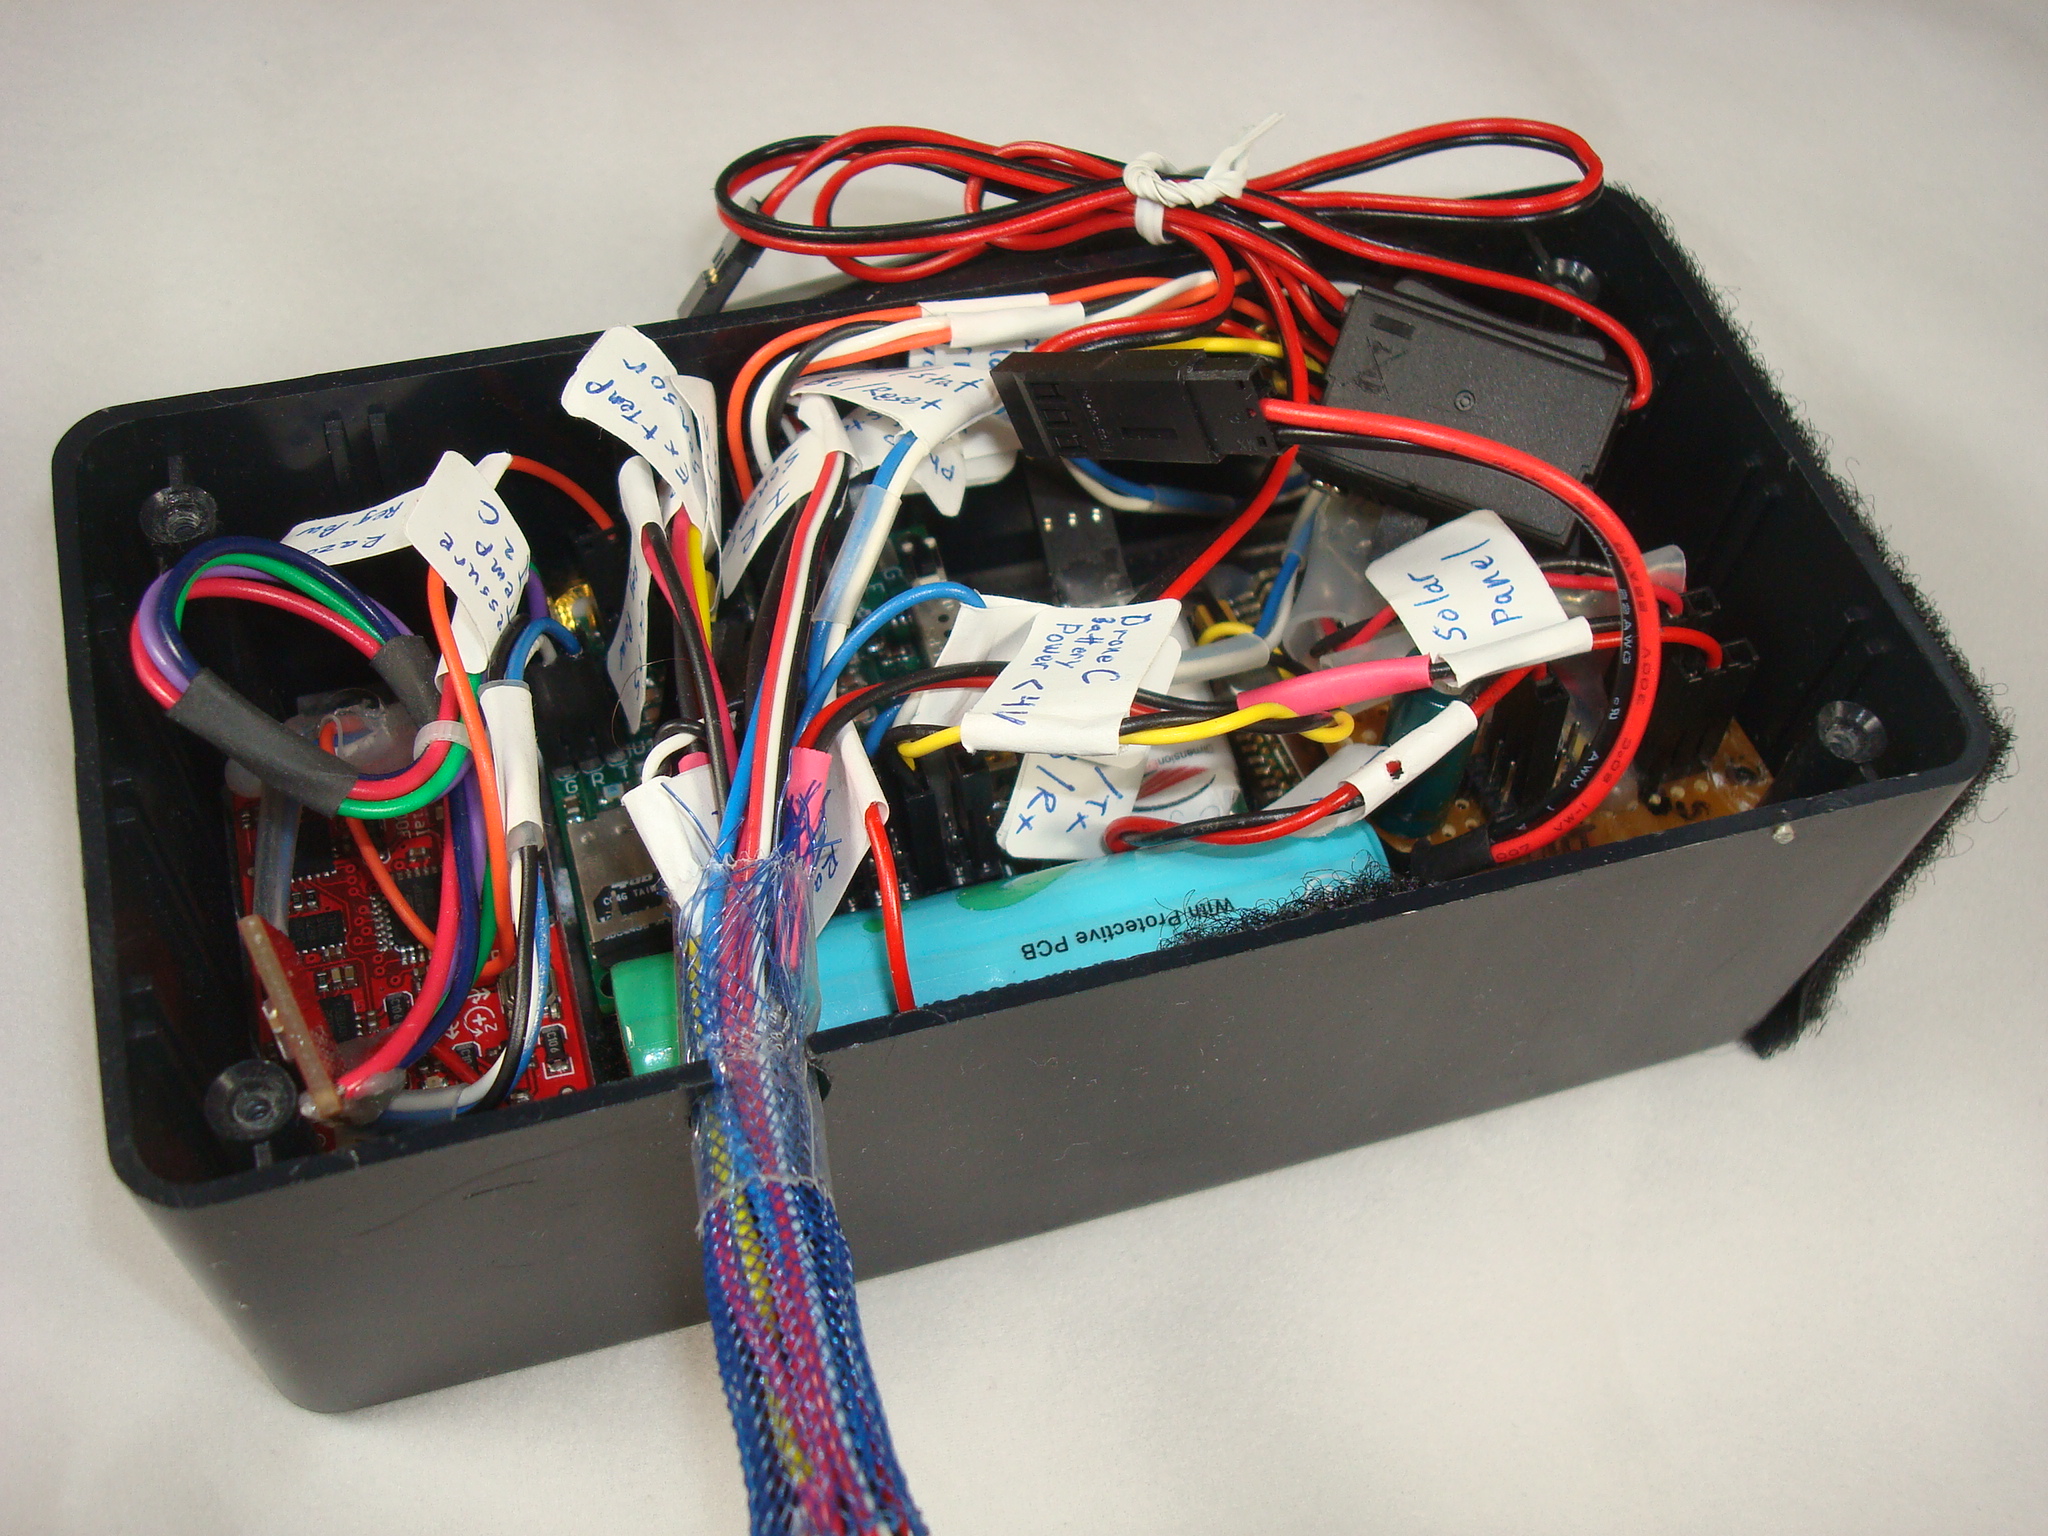
My next (and final) idea was to buy a large project box from Radio Shack. I used screws and spacers to mount all the PCBs, and velcro to mount the battery (so it can be easily swapped out). As there were countless wires inside and I had serious difficulty keeping track of all the colors, I ended up putting labels on everything. Labels are good as it helps keep you from plugging the wrong stuff in to the wrong places. I strongly recommend it for space balloon launches to prevent dumb mistakes. You should also color code your wires, such as black for ground, red for 5V, purple for 3.3V, white for analog signals, green for digital signals, etc. Whatever you like - just be consistent across all of your projects. Click the below example image to enlarge:
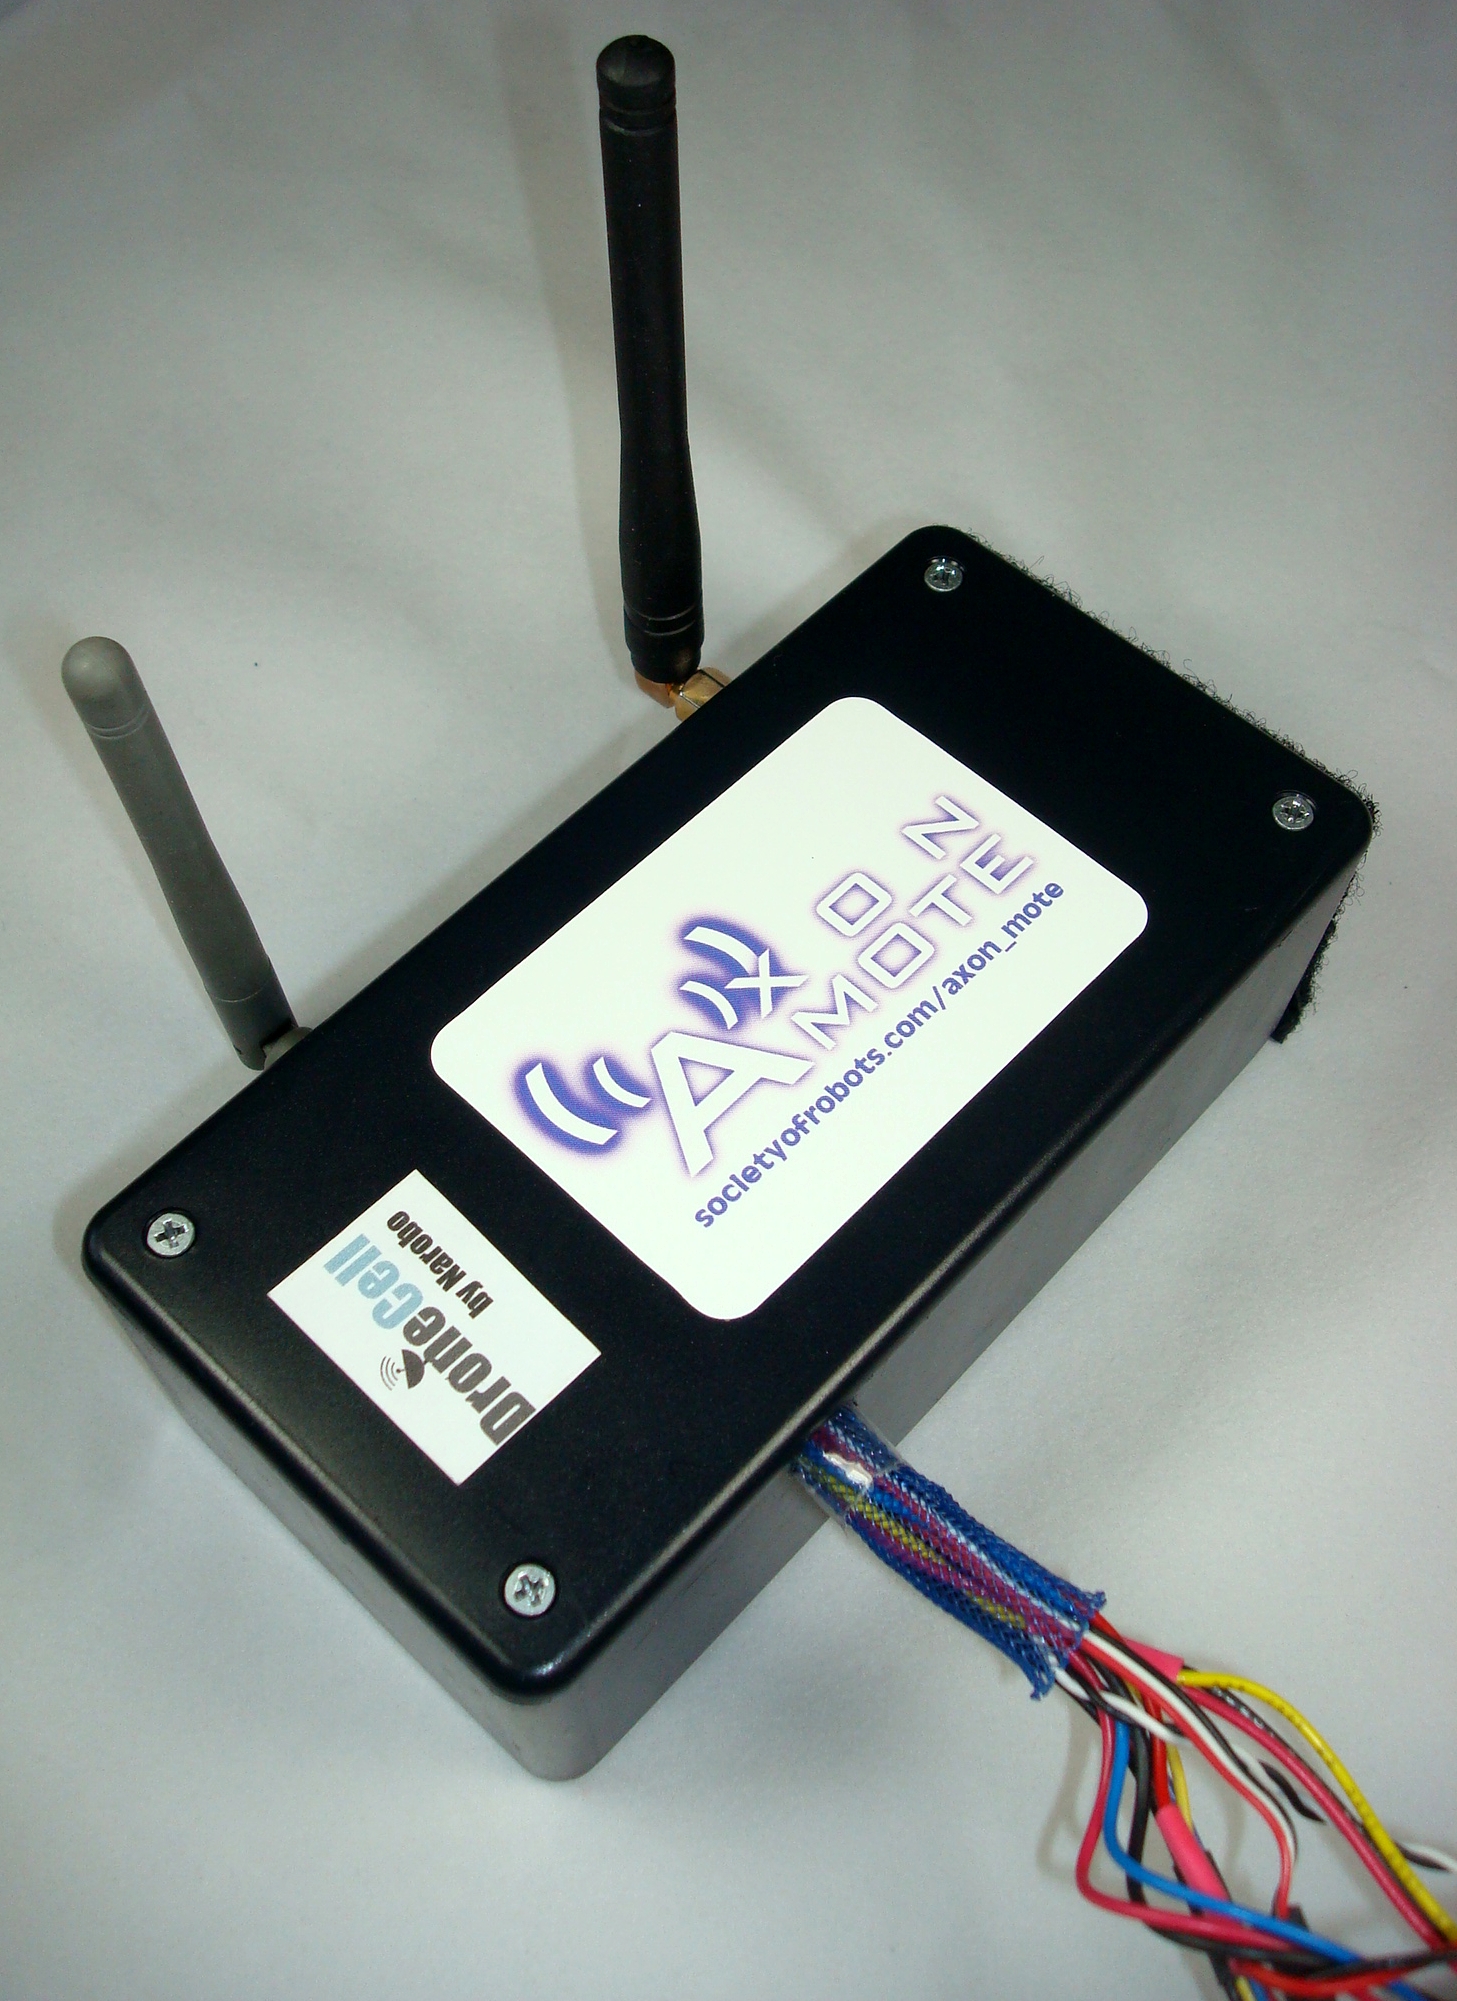
This is what it looks like when closed up. Very professional looking I'd say. =)
These are all the electronics I developed to go on the SB4 and SB5 balloon flights. Click the image to enlarge.

Society of Robots copyright 2005-2014